
Welcome to Couleur Nature’s Tasty Tuesday, a weekly feature on a French recipe—with tantalizing pictures to accompany!
Growing up, I had the good fortune of living nearby a little hole-in-the-wall bakery, which made the best baguettes I ever knew (well, apart from the ones in Paris). My mother told me they would wake up at the crack of dawn everyday to start baking, and as soon as they opened their doors to let the people in, the baguettes would start flying off the counter. The crust of their baguettes was perfectly golden and crunchy, but the interior was smooth as silk and so, so soft!

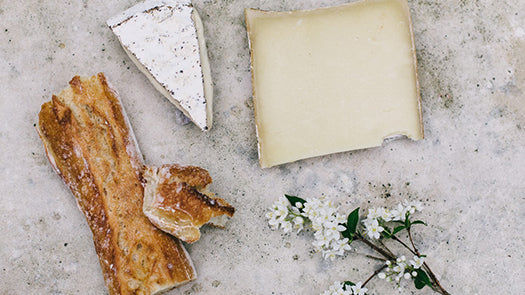
Via Mister J Photography@Flickr
Every bakery has its own secrets for making its bread, and French baguettes are no exception. But I’ve gathered 6 key points of any good baguette recipe to share with you, so you too can have a try at making your own delicious baguettes! Good baguettes definitely take a while to make, and this recipe is no exception (it takes at least 8 hours–but don’t worry, most of the time is for letting the dough sit around), but I promise the results are worth the wait! The recipe I use has been adapted from America’s Test Kitchen, with a little tweak in the baking process.
Secret #1: The Right Flour
Sure, you could go ahead and use regular All-Purpose flour, but the closer you can get to that Parisian ideal of crispy, chewy perfection–well, the happier you’ll be. The French typically use Type 55 flour for their baguettes, which has a lower protein content than All-Purpose flour (usually 11.5% protein). I know that’s not found in your standard supermarket, but you can buy it online from King Arthur Flour. (There’s also a math formula for making a substitute from various flours but I never really fancied math.)
Secret #2: Start with a Sponge
One of the secrets of a great baguette is to start with a sponge (a mix of flour, water, and yeast), which gives the yeast time to mature and combine with the other ingredients, creating the mildly sour and nutty flavors and chewy texture. Using warm water with the yeast is important, because yeast is alive and needs to be “active” to work. Water that is too cold or hot will kill it, and water that is not warm enough will leave it inactive, so it can’t do its job and puff up your dough. A bit of sugar with the yeast is also good, because sugar helps the yeast grow.
Secret #3: Let It Rest
After the dough has been kneaded for the first time, it’s left to sit for 20 minutes before kneading again. This allows the gluten in the dough to redistribute, resulting in a softer, smoother, well-mixed dough.
Secret #4: A Baking Base
Rather than just baking on a regular baking sheet, you should use a baking stone as the surface to lay the baguettes on, because they will retain heat and distribute heat evenly. If you don’t have a baking stone, flip a thick, sturdy baking sheet upside down, line it with parchment paper, and bake it on top of that.
Secret #5: The Perfect Oven Temperature
To get that perfectly crisply, crackly crust with a moist interior, America’s Test Kitchen recommends that you preheat the oven to 500 degrees–then immediately lower it to 425 degrees as soon as the baguettes go in the oven.
Secret #6: Hydration is Key
Okay, here’s where I parted ways with ATK’s method: I noticed how they didn’t mention anything about hydrating the bread when it was in the oven. Most of the recipes I researched for French baguettes recommended steaming the loaves after they’re popped in the oven, because French breads traditionally have a high level of hydration. (While a sandwich loaf may have a water ratio of 55%, French bread is more likely to be 70-75%.)

French Baguettes
Adapted from America’s Test Kitchen
Makes 2 baguettes
Sponge:
½ cup (2¾ ounces) bread flour
½ cup warm water (110 degrees)
½ teaspoon instant or rapid-rise yeast
½ teaspoon sugar
Dough:
3–3½ cups (16½ to 19¼ ounces) bread flour
¾ teaspoon instant or rapid-rise yeast
1½ cups warm water (110 degrees)
1½ teaspoons salt
Glaze:
1 large egg beaten with 2 tablespoons water
1. FOR THE SPONGE: Stir all of the ingredients together in a medium bowl until combined. Cover with plastic wrap and let sit at room temperature. Let it rise for about 2 hours then wait for it to fall (about 4 hours) before using.


2. FOR THE DOUGH: Combine 3 cups of the flour and the yeast in a standing mixer fitted with the dough hook. With the mixer on low speed, add the water and mix until the dough comes together, about 2 minutes. Stop the mixer, cover the bowl with plastic wrap (no need to remove it from the mixer), and let sit at room temperature for 20 minutes.
3. Remove the plastic wrap, add the sponge and salt, and knead the dough on medium-low speed until it is smooth and elastic, about 8 minutes. If after 4 minutes more flour is needed, add the remaining ½ cup flour, 2 tablespoons at a time, until the dough clears the sides of the bowl, but sticks to the bottom.
4. Turn the dough out onto a lightly floured counter and knead by hand to form a smooth, round ball. Stretch a small piece of dough out thin. If the dough does not tear and you can see light through the dough, it is adequately kneaded. (If the dough tears, knead a bit more and test again.) Place the dough in a large, lightly oiled bowl and cover tightly with greased plastic wrap. Let rise in a warm place until doubled in size, about 1 hour.
5. Slide a plastic bench scraper or rubber spatula under one side of the dough; gently lift and fold a third of the dough toward the center. Repeat the previous step with the opposite side of the dough. Finally, fold the dough in half, perpendicular to the first folds. The dough shape should be a rough square. Cover, let rise for 30 more minutes, then repeat the turning process. Cover and let rise until the dough has doubled in size, about 30 minutes longer.

6. Top a large rimless (or upside down) baking sheet with parchment paper. Turn the dough out onto a lightly floured counter and divide it into 2 equal pieces. Working with one piece of dough at a time, gently pat the dough into a rough 8 by 6-inch rectangle, with the long edge towards you. Gently fold the bottom third of the dough up to the center and press to seal. Gently fold the bottom of the dough up to the top and press to seal. Using the side of your floured hand, create a large crease down the middle of the dough. Working from one end of the loaf to the other, pinch the top and bottom of the dough together securely. Gently roll the baguette back and forth to stretch it into an even 15-inch-long baguette, about 2½ inches wide. Lay the loaf seam side down on the parchment-lined baking sheet, spaced about 5 inches apart. Mist the baguettes with vegetable oil spray, cover loosely with plastic wrap, and let rise in a warm place until nearly doubled in size and the dough barely springs back when poked with knuckle, 1 to 1½ hours.

Via America’s Test Kitchen
7. Meanwhile, adjust an oven rack to the lower-middle position, place a baking stone on the rack, and heat the oven to 500 degrees. Place a baking sheet, which will serve as the steam pan, with a 1-inch rim under the shelf with the baking stone. Let the baking stone heat for at least 30 minutes (but no longer than 1 hour).
8. FOR THE GLAZE AND TO BAKE: Remove plastic wrap from the dough 15 minutes prior to baking. Just before baking, score the top of the breads with a razor blade or sharp knife, cutting four ½-inch-deep slashes along the width of each baguette. Brush the breads with the egg-water mixture, then spray lightly with water. Carefully slide the breads and parchment onto the hot baking stone. Immediately reduce the oven temperature to 425 degrees and pour 1 cup hot water into the steam pan. (Always use an oven mitt and wear long sleeves when adding water to the hot steam pan to prevent steam burns. Using a watering can with a long spout when pouring the water into the steam pan provides control and distance from the hot steam.) Bake until the crust is deep golden brown and the center of the bread registers 210 degrees on an instant-read thermometer, about 25 minutes, rotating the loaves halfway through baking.
9. Transfer the breads to a wire rack, discard the parchment, and let cool for about 30 minutes before serving. (Letting it cool allows the crust to become more crispy).

Via SilkeFabrikken@Flickr
And of course the most important part, serve on a Couleur Nature French placemat or table runner.
Please leave a comment! I’d love to know how your baguettes turn out!
Check out our Pinterest for more delicious baguettes!
